Hi everyone!
As I hinted in my previous blog, today’s post is all about my favourite comfort food recipes (Indian food edition haha)! Like many other people, I’m no exception when it comes to getting comforted by delicious, homemade food, especially if it’s my mother who is cooking them. Since I moved to Canada, my mother’s cooking is one of many things that I miss terribly from back home 😥 (My plant babies being another). However, living alone also means preparing meals for myself, and that has given me many opportunities to experiment in the kitchen in order to recreate my mother’s recipes. I cannot say that I’ve succeeded in creating the exact same taste as my mother’s cooking, but I’m a bit proud of myself for making them taste really good nonetheless.
There are many things my mother used to make regularly that can be included in my ‘comfort food’ list, but then we’ll never see the end of this blog, so I’ll just share some of my absolute favourites with you all. I’ve selected these recipes based on a couple of factors: 1) They are SUPER easy to follow, 2) Does not require a lot of preparation time or ingredients, and 3)They are all gluten-free, vegetarian (can be made vegan-friendly) recipes.
Let’s start off with something that’s not just my go-to comfort food, but entire India’s haha!
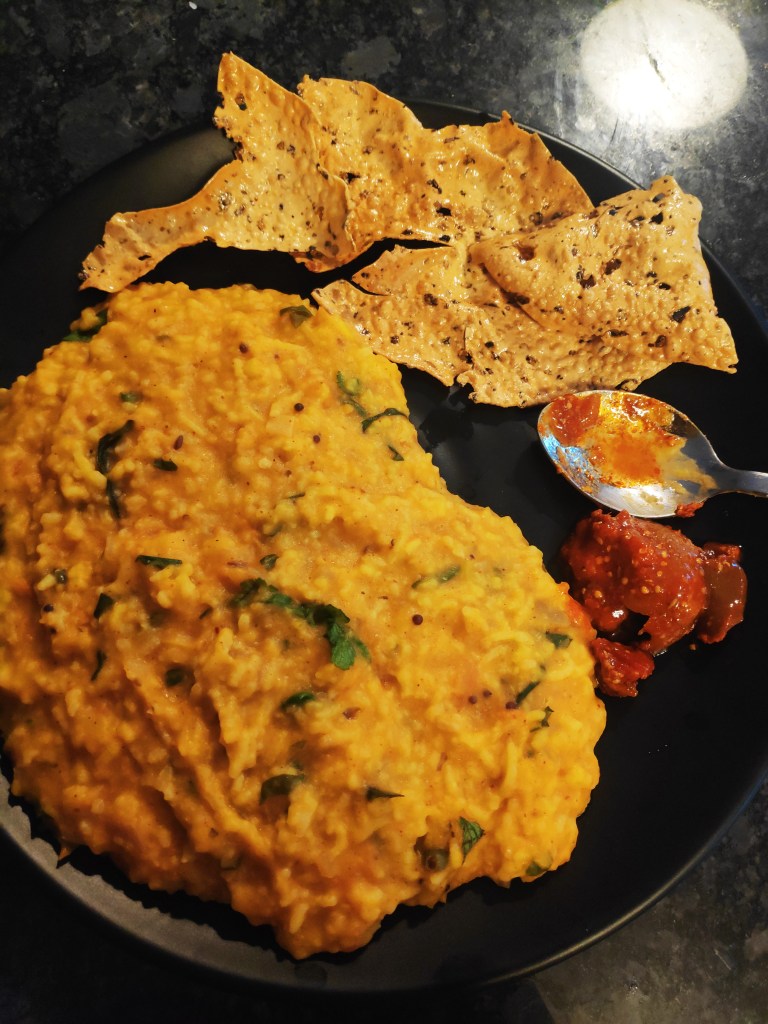
Khichdi
Every nation has its own version of comfort food, loved by a larger population either for the ease of making or for the health benefits. Khichdi in that sense, is the ultimate Indian comfort food. In Southern India, it’s known as ‘Huggi’ in Karnataka and ‘Pongal’ in Tamil Nadu. In Northern and Western parts of India, it’s mainly called Khichdi. One of the many great things about this Indian culinary comfort is how versatile it is. While the only necessary ingredients to make khichdi include rice and lentils, every household has their own way of making it.
My favourite version of khichdi is a typical, traditional khichdi devoid of any strong spices or fancy ingredients. With as little ingredients as rice, naked moong lentil, some dry spices and salt; I believe it’s a one-pot cure for anything! Sometimes I also like to add a few vegetables like tomatoes, onions, carrots and beans to take it up a notch.
Ingredients
- 1 cup rice
- 1 cup moong lentil
- 6 cups water
- 2 Tbsp. Ghee (if vegan-oil)
- 1 green chili (finely chopped)
- A pinch of Asafeotida
- 3/4 tsp. cumin seeds
- 1/4 tsp. turmeric powder
- 1 tsp. cumin-coriander powder
- Salt to taste
- 1/2 tsp red chili powder
Recipe
- Rinse both the rice and moong lentil thoroughly either separately or together. Soak them in some water for about 10 minutes (if you are cooking in a pan/pot, soak it for 30 minutes).
- In the mean time, if you would like to add any vegetables (i.e. tomatoes, onions, beans etc.), finely chop them and get them ready.
- Heat the pressure cooker slightly and add about 2 tbsp of ghee (if you are vegan, you can substitute this for oil). P.S. I like to make my khichdi using a pressure cooker, but if you do not have access to one, you can also make this in a pan with it’s lid partially closed. I would however strongly recommend investing in a pressure cooker as it makes life easier haha!
- Once the ghee melts (oil heats up), lower the flame and add cumin seeds. Sauté them till they become slightly roasted and give off an aroma. Now add a pinch of asafoetida and sauté again for about 30-40 seconds.
- Next add a green chili (and any other vegetables you are using) and sauté well.
- Once the vegetables become softer, add in the dry ingredients like turmeric, red chili and cumin-coriander powders and salt. Mix everything well.
- Now drain the rice and lentils you put aside before completely and add them into the cooker with everything else. Give it a good mix and cook for about a minute or two.
- Next add about 6 cups of water (I like to keep a ratio of 1:3 for rice+lentil : water). This will give khichdi a porridge like consistency. Pro tip: After mixing everything, taste the water. It needs to be slightly salty.
- Now cover the pressure cooker/partially cover the pan and let it cook. If you are using a pressure cooker, about 3 to 4 whistles over a medium flame would give your khichdi a nice mushy texture. If you want it to be a bit grainy, 2 whistles would be enough. For a pan/pot, cook until the lentils and rice is fully cooked over a medium flame. Keep checking to see if it needs more water. In order to get the mushy texture as pressure cooked khichdi, once the lentils and rice are soft cooked, mash it slightly with a masher or ladle.
- Last step! Wait for the pressure from the cooker to release naturally and then open the lid. Give it a last stir and serve it hot. I like to add an extra dollop of ghee on top. You can have it plain or you can also have it with some curd and pickle.
Not only it is very easy to make this type of Khichdi, it is also quite nourishing and has many health benefits. According to Dr. Manoj Ahuja from Fortis Hospital, khichdi is the perfect balance of carbohydrates and protein. Adding a dollop of ghee also makes up for the right amount of macronutrients and complex fat. Another health benefit is that khichdi is quite easy to digest. It’s often recommended by doctors in India when one is not at their best health and needs fast recovery. And lastly, it’s Gluten-free! Thus, it’s a perfect food for people who either suffer from gluten sensitivity or have opted to live a gluten-free life.
Spinach Dal
This is another one of my absolute favourite food that brings great comfort and joy to me! During my undergraduate and then graduate studies back in India, I used to participate in a lot of field work. After returning from such fun but exhausting trips, I’d always ask my mother, “what’s for dinner?”, to which she would simply answer, ‘dal’, and that would make my day to be honest! There is just something really comforting and warming about this creamy lentil stew. Similar to khichdi, dal is also quite versatile and can me made using many different ingredients. Today I’m sharing one of the many versions of dal, Spinach dal. This was one of the first dishes I learned to cook and after a few years of practice and experiments, I like to believe, I’ve gotten quite good at making a tasty spinach dal.


P.S.: Before we go any further, I’d like to clear some confusions regarding dal/lentils. Dal and Lentils both basically mean the same thing. “Dal’ is a Hindi word, generally used to refer to the ingredient as well as the cooked dish itself. So when you call it a lentil dal, you are just repeating the same word in two different languages (quite similar to ‘chai tea’ haha). While personally, it’s not really offensive, I do find it just a little bit annoying.
Ingredients
- 1 cup lentils of your choice
- 3 cups water
- 1 cup chopped spinach
- 1/2 cup onion (finely chopped)
- 1 cup tomato (finely chopped)
- 1 inch ginger (grated/finely chopped)
- 2-3 garlic cloves (finely chopped)
- ~ 2 Tbsp ghee/oil
- 1 tsp cumin seeds
- 1/2 tsp turmeric powder
- pinch of asaphoetida
- 1 tsp red chili powder
- 1 tsp cumin-coriander powder
- 1/2 tsp garam masala
- salt to taste
- freshly chopped coriander and lemon juice
Recipe
- First, thoroughly clean and wash the lentil of your choice with water and let it soak in some clean water for about 10 minutes. For this recipe I’m using split ‘Toor’ dal or Pigeon pea, but you can pretty much use any dal you like. The only noticeable difference will be the cooking time.
- From this point onwards, the recipe is split in two parts. First we will cook the lentil and spinach separately and then in the next part add all the spices and other vegetables in form of a ‘tadka’, which is basically a tempering technique in Indian cooking. This is what will give this dal an amazing flavor profile!
- To cook your lentil and spinach, first heat up a pot/pressure cooker and add a spoonful of ghee (or oil). Now add in your soaked lentil and mix it well with the melted ghee. For each cup of lentil add about 3 cups of water (again we’re going with 1:3 lentil:water ratio).
- Add 1/2 tsp of turmeric powder and salt as per your taste and let it simmer for a couple of minutes.
- Now add in your chopped spinach and give it a good stir. Once you see that the water has become quite hot and will soon start boiling, close the lid of the pressure cooker/partially close the lid of the pot and let it cook on medium flame. Normally, pigeon peas take slightly longer time to cook compared to moong dal. So, in a pressure cooker bring it to 4 whistles and if you’re cooking it in a pan/pot, let it cook for about 15-20 minutes on low heat.
- Once the lentils turn soft, turn off the heat and set them aside while we take care of the tadka.
- To make the tadka, take a pan and heat up your ghee or oil over medium-high heat. Add some asafoetida and cumin seeds and sauté them for about 30-40 seconds or untill the seeds start to sizzle.
- Now add in your finely chopped green chilies, ginger and garlic and let them cook till garlic turns slightly brown. Then add in your finely chopped onions and tomatoes and let everything cook till the onions become translucent. Here also add in a pinch of salt to cook the vegetables faster and to draw out the moisture.
- Next up add all the dry spices including cumin-coriander, red chili powders and garam masala. Always keep in mind that these dried spices can burn easily so lower the heat accordingly before you add them in.
- Now let everything cook for another 30 seconds and then carefully add it to the cooked lentils. Stir well and turn off the heat.
- To take it one step higher, once you’ve taken it off the heat, add in some finely chopped coriander and squeeze some lemon juice on top. Pro tip: add in the lemon juice only if you’re going to eat the dal in an hour or two, otherwise your dal might turn a bit bitter in taste.
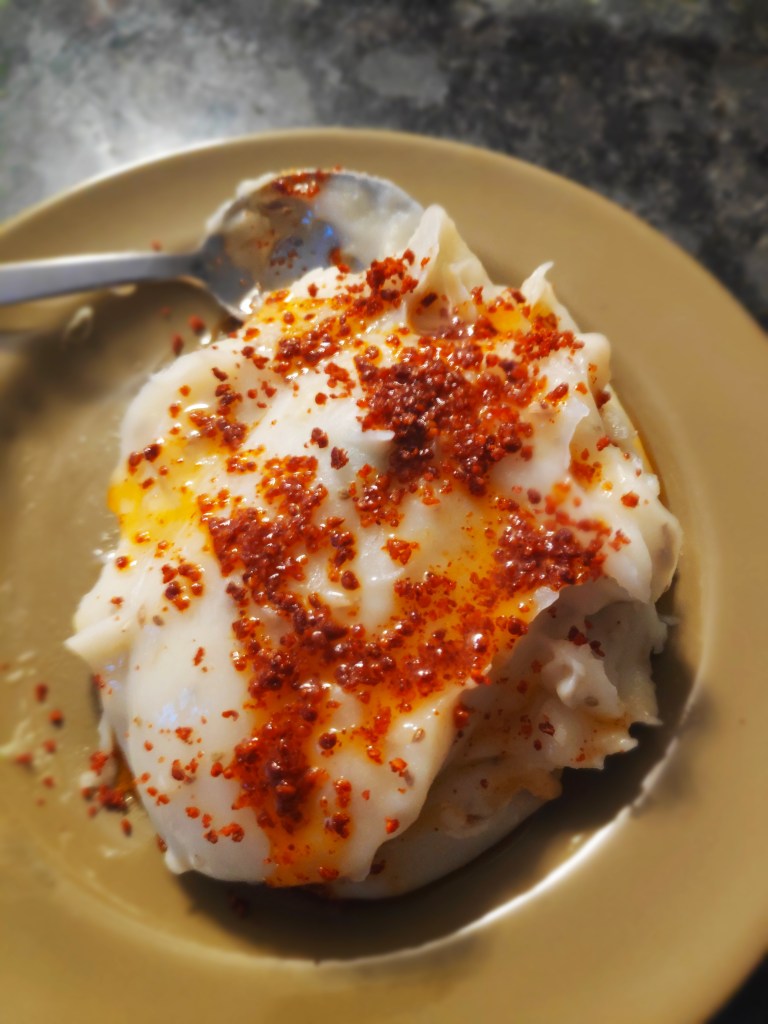
Khichu
This one is a bit special because it is food from my state, Gujarat. Khichu is a simple, easy to make, delicious snack. It is also quite famous as a street food. A khichu is basically steamed rice flour made delicious using ingredients like green chili and ginger. This is the easiest recipe among all that I’ve shared today.
Ingredients
- 1 cup rice flour
- 2 and 1/2 cups water
- 1/4 tsp baking soda
- 1 tsp green chili and ginger paste (or finely chopped)
- 1 tbsp oil
- 1/2 tsp cumin seeds
- 1/4 tsp carom seeds
- salt to taste
- Achar masala
Recipe
- First up heat up the water in a pot and add cumin seeds, carom seeds, chili-ginger paste, baking soda and salt in it.
- Bring the water to a boil and let it simmer for about 10 minutes on a medium to low flame.
- Now carefully mix in the rice flour and stir it continuously using a wooden spoon or rolling pin to avoid any lumps from forming.
- Now put on a lid, turn down the flame to the lowest and slow-cook the mixture for about 2-3 minutes. keep mixing it every 15-20 seconds.
- And that’s it! Serve it in a dish and pour some ‘achar masala’ and oil on top. You can find this achar masala at any Indian/Asian grocery store.
And lastly, when I’m in the mood for eating something really tasty but in no mood to cook at all, my go-to food is instant noodles. Not just any noodles mind you, it has to be ‘maggi’ noodles. I was really glad when I found out that these noodles (with the Indian tastemaker) are also easily available in Canada and are not over-priced haha! 😀 All my friends from back home can attest to my love for them. Depending on my mood I sometimes keep it simple or sometimes add as many vegetables as I like, and when I’m feeling especially fancy, I also like to add some Paneer in it. My ‘something extra’ that I like to put in my maggi noodles is a spoonful of schezwan sauce to spice it up a little.
Until next time!

